CONFIGURING YOUR HARDWARE APPLIANCE TO PRESENT ISCSI TARGETS FROM THE CLOUD LOCALLY OVER FC
INTRODUCTION
This guide will teach you how to present your off-prem iSCSI devices locally on a Fibre Channel target. This allows the devices in the cloud to be connected to local FC hosts using WANrockIT acceleration. This tutorial will use a Windows Server 2012 with a Fibre Channel HBA, a WANrockIT 200 series hardware appliance with Fibre Channel capabilities, and a WANrockIT Node in the AWS cloud.
Before following this guide, ensure you have performed the following:
- iSCSI Initiator: AWS or iSCSI Initiator: AWS Storage Gateway – Logged onto your chosen devices from your AWS Node.
- WAN Link Connectivity – Connected your AWS Node to your on-prem Node.
SETTING THE FC PORT CONFIGURATION
In order to connect hosts to your local WANrockIT Node must have at least one Fibre Channel port set to present in “Target Mode”. To do this, log into the web interface, then click on the “FC Port Configuration” button from the home screen as shown below.
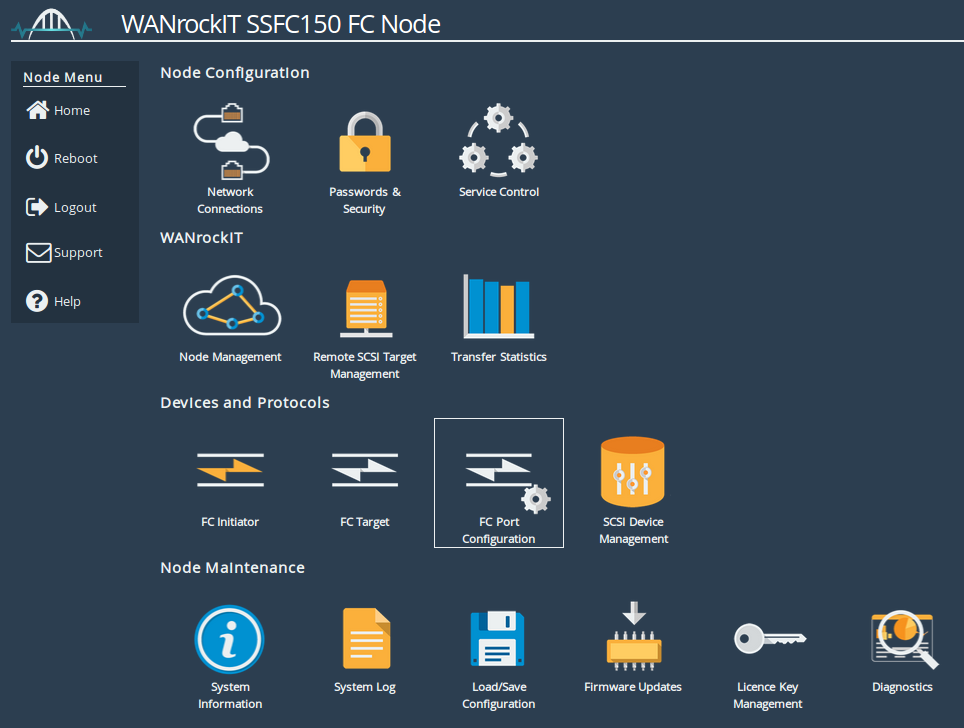
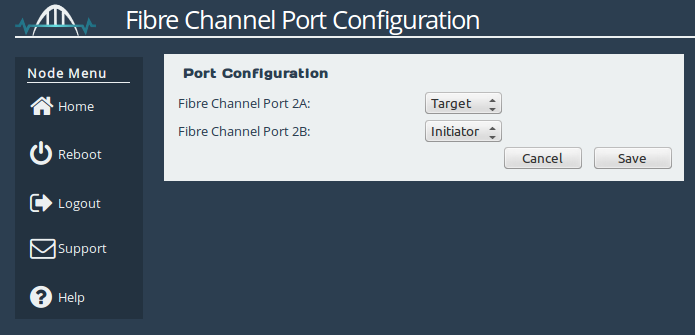
This will bring up a page showing all of the Fibre Channel ports on the Node. From the example in the image below, both ports are in their default configuration. “Port 2A” is set to target mode as required. If your configuration does not have any ports set to “Target”, change one of the ports and click the “Save” button. A reboot will be required for the changes to take effect.
CONNECTING TO A FIBRE CHANNEL HOST
Note that PCI slots are numbered, starting at 1, from left to right; and ports on each HBA are lettered from left to right. E.g., in the picture below the Fibre Channel cable is connected to Port 1A. Using an LC-LC Multi-mode Fibre Channel cable, connect your target mode port to your Windows host. An 8Gb card will only support hosts running at speeds at 2Gb and above; if your host is using a 1Gb Card or SFP please contact Bridgeworks Support.
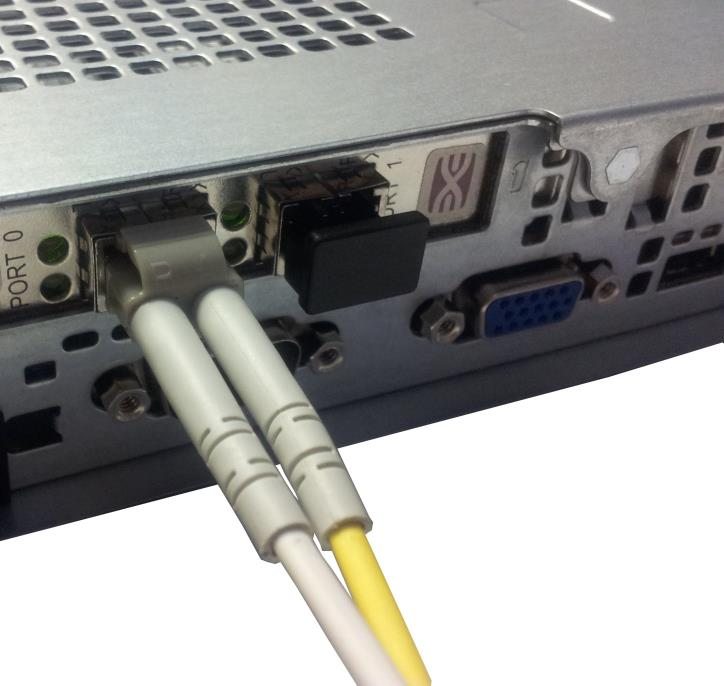
It is important to note that your link will not become active without any devices presented. When you do have devices presented the amber LED will blink, the pattern differing depending on the speed of the link. One flash indicates a 2Gb link, two flashes in succession indicates a 4Gb link and three flashes in succession indicates an 8Gb link.
CONFIRMING THE PRESENCE OF TARGETS
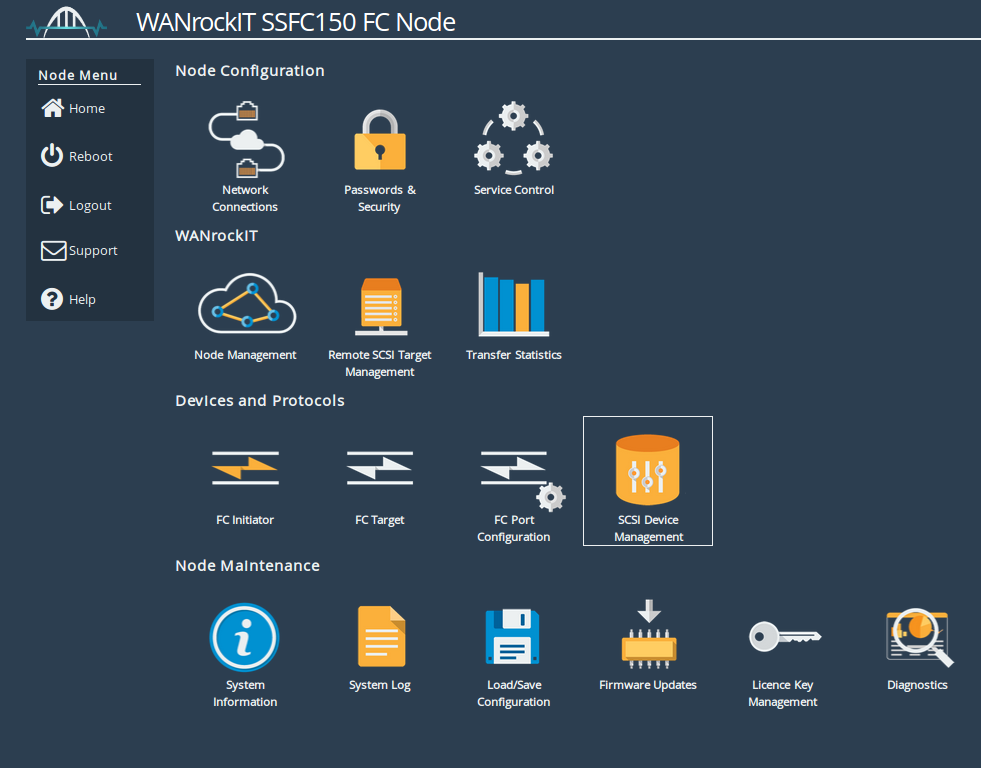
In order to confirm that targets will be presented to your host, you should confirm that there are devices present on your Node from other WANrockIT Nodes. To do this navigate to “SCSI Device Management” by clicking the corresponding icon as shown below.
You will be presented with a page that contains a list of all the devices connected to your Node as either “Directly Connected Devices” (i.e. Fibre Channel devices that are physically plugged into this Node) or as “Devices registered from other WANrockIT Nodes” (i.e. a WAN connection was established to another WANrockIT instance which has “Directly Connected Devices”).
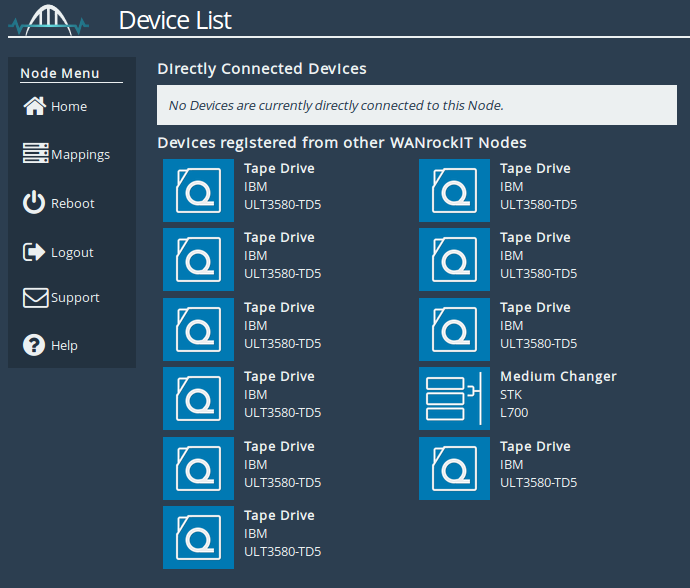
Only devices which are registered from other WANrockIT Nodes will be available to be logged into. If you do not have any devices please see the guides Configuring your AWS WANrockIT Node to Present the AWS Storage Gateway On-Premise, Configuring your AWS WANrockIT Node to Present Generic iSCSI targets On-Premise and WAN Link and Connectivity. If you have already followed these guides then please see our Troubleshooting FAQ.
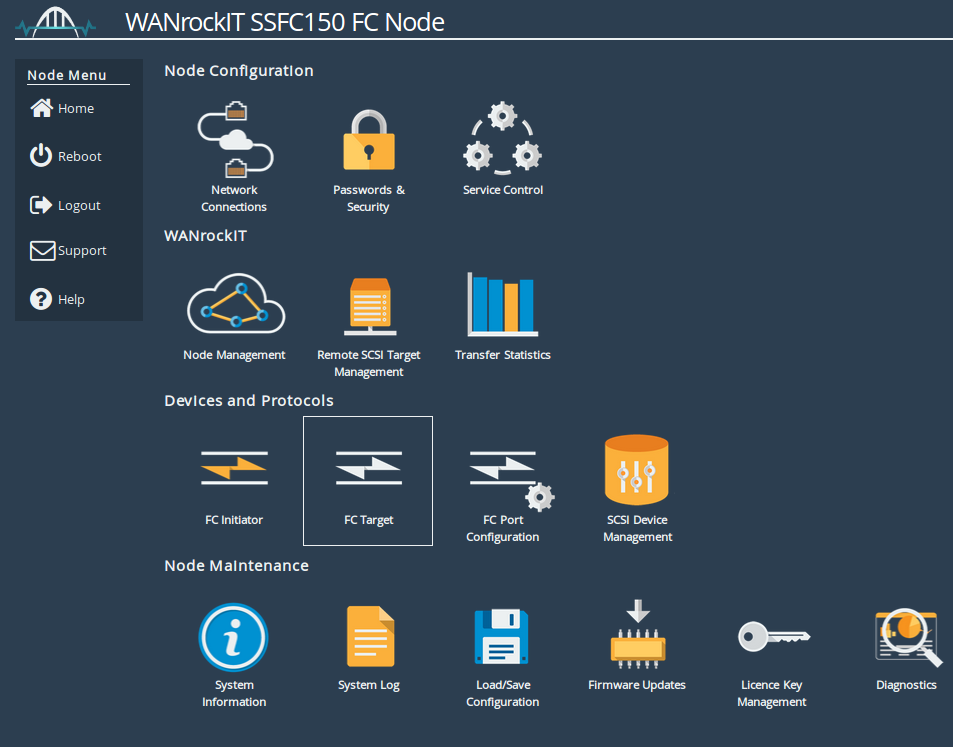
CONFIGURING THE WANROCKIT FIBRE CHANNEL TARGET
From the home screen click on the “FC Target” page as shown below.
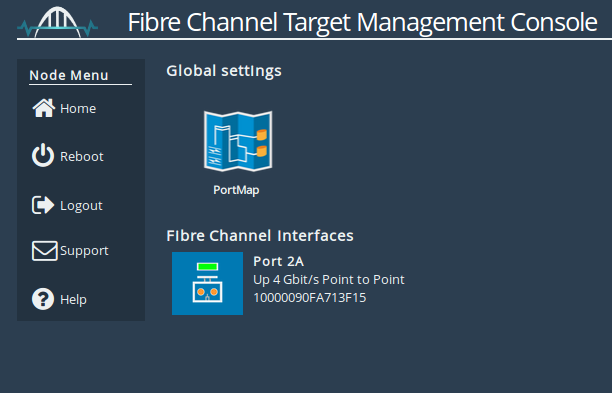
From this page you can see that “Port 2A” is “Up” and has negotiated a speed of 4 Gbits/s. By default, target devices are each assigned a Logical Unit Number (LUN) . The ordering of the LUNs is arbitrary. In order to guarantee that a target will be assigned the same LUN persistently (required for some backup packages), click the “Port Map” icon. It is recommended to perform this step if you are unsure if you require it or not.
You will be presented with the following page:
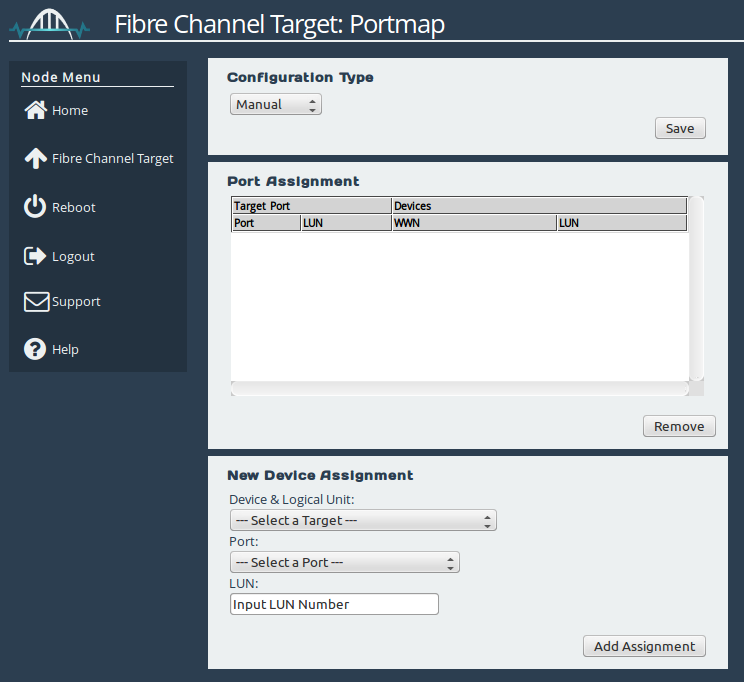
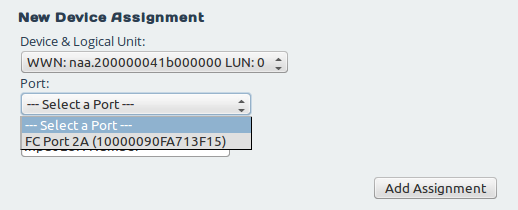
First click the drop-down under the “Configuration Type” menu and change the option from “Manual” to “Automatic”. Next select a Target from the “Device & Logical Unit” drop down box, as shown below.

Then select the port you wish to map it to. (If you require it to be mapped to multiple ports, repeat these steps and add an additional entry mapped to the next FC Port.)
Enter a LUN number. As this is the first LUN being mapped, you must start with LUN 0.Each LUN may only be used once on each port. It is recommended to increment LUN numbers consecutively.
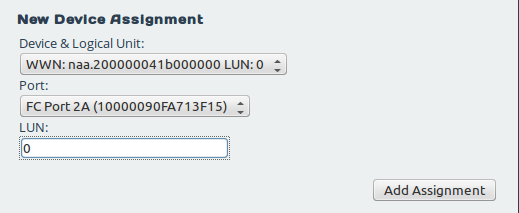
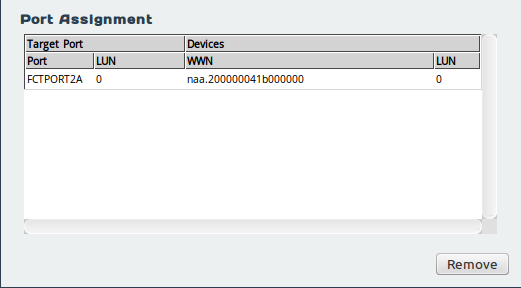
Once the three fields have completed click “Add Assignment”, and the entry will appear in the “Port Assignment” list as shown below.
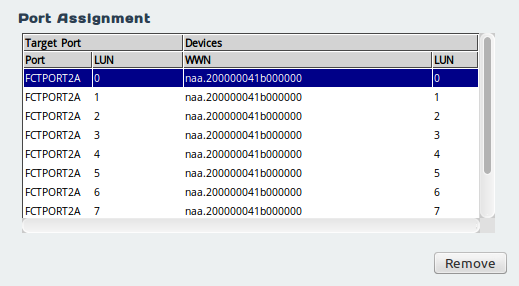
You must now repeat this process for all of the devices you wish to present to your Fibre Channel host.
You have now completed setting up your Fibre Channel WANrockIT Node to locally present targets from the cloud.

Bridgeworks have looked at the problem of data movement and come at it from an entirely new perspective. In mastering the rules of data movement over distance, Bridgeworks have now broken them to provide you with the ability to move significant volumes of business critical data in real time removing unacceptable time lags, that risk failure, delay or presents major costs to your business.