LAUNCHING YOUR AWS WANROCKIT NODE
INTRODUCTION
The following guide will take you through the steps for deploying your AWS Node from the Amazon Market place. Your AWS cloud Node must be bought from the AWS Marketplace. There is no support for launching a virtual instance and migrating it into the cloud. To launch the instance please visit the AWS Marketplace at aws.amazon.com/marketplace . In the search bar, you should type “WANrockIT” to see a full list of all the WANrockIT versions. One of our search results is the WANrockIT 410, so you should click through to the product page and then click on the “Continue” button.
Direct link to 410 series click here
DEPLOYING THE NODE
From the Launch page, you should open the Region section and choose which region the AMI will be launched in. It is recommended that you should pick the region which is geographically nearest to the location from which you are preforming the backups, in order to achieve greater performance. However if you have an existing infrastructure you wish to accelerate the Nodes must be deployed with the FTP or iSCSI devices you wish to accelerate. For this example, Northern California will be used.

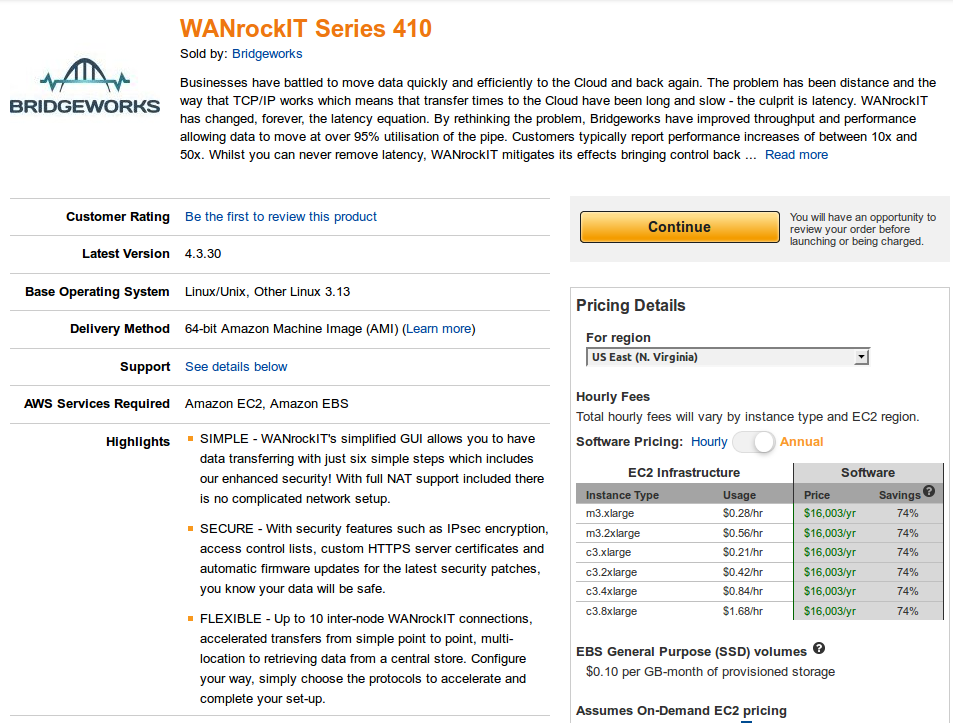
The next step is to choose the EC2 Instance Type. The lowest tiered machine is an m3.xlarge, which will be suitable for 1-gigabit links not utilising IPsec, or up to 60 megabytes a second with IPsec enabled. The higher the tier, the better the IPsec performance will be. It is recommended to start on a lower tier and to increase it later if it does not meet your performance requirements.
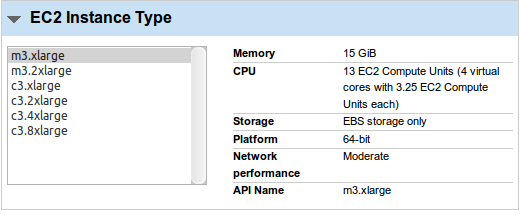
Select the VPC and subnet into which you wish to launch the WANrockIT instance, as shown below:
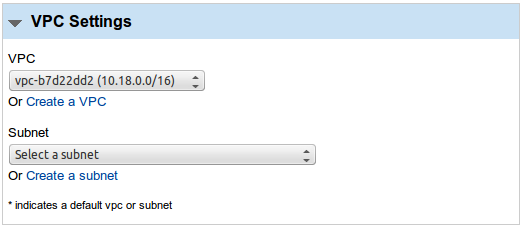
Next, you will have to choose a security group. It is recommended that you use the predefined WANrockIT security group, which will provide access to the Node’s command line and web interfaces. However, the source IP should be changed from “Anywhere” to the IP address of the premise from which you will be administrating the WANrockIT setup. Selecting “My IP” for each rule is usually suitable.
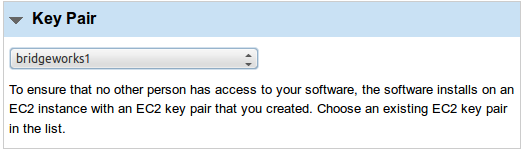
You will need to choose a key pair to enable SSH access to the instance. SSH will provide a limited text-based interface to view some settings of your WANrockIT Node. It is recommended that you instead use the web interface for controlling the settings of your Node.
You are strongly advised to read the terms and conditions in the EULA. When you have read the EULA and have reviewed the options click the “Accept Terms and Launch” button, shown below:
![]()
If you navigate to the instance list, you can see the new instance starting up. Here you can give it a name tag and make the last few adjustments to the instance’s settings from the AWS console, before moving on to configure the Node from the WANrockIT web interface.
ADDING AN ADDITIONAL NETWORK INTERFACE
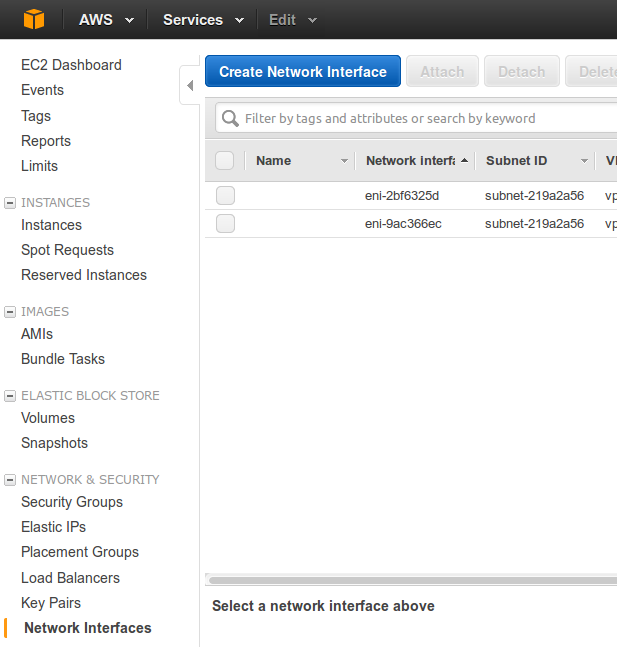
The instance will launch with one network interface by default. It is recommended that two network interfaces are used: one over which your WAN link will accelerate traffic; and another for the LAN-based connected devices you wish to accelerate, such as iSCSI devices or FTP servers. For a detailed description of port mappings, see AWS Initial Setup. To add an additional network interface, open the AWS EC2 Management Console, open the Network Interface section and click “Create Network Interface”.
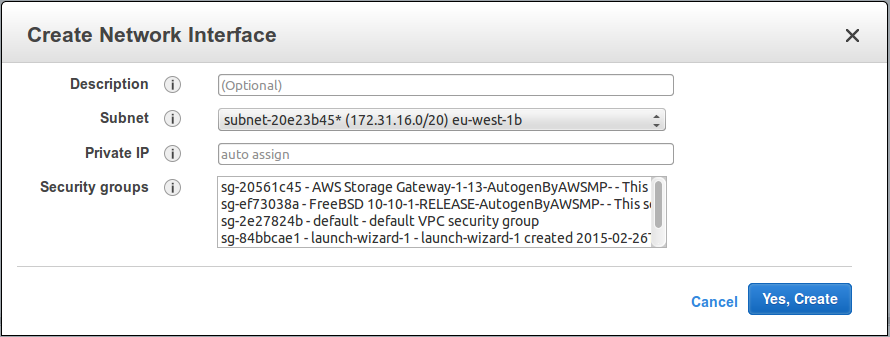
You should give the created interface a description such as “WANrockIT network”, select the subnet into which you previously launched the Node instance and then select its security group. Click “Yes, Create”, and you will have a new interface to attach.
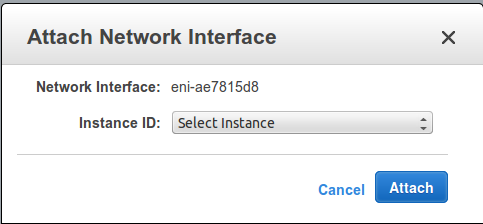
Right-click the interface, then attach and choose the Node from the list. If the WANrockIT instance is currently running, a reboot will be required for the new network interface to be registered and configurable.
Additional rules will need to be added to your security group in order to allow the Node to communicate with your hosts in AWS, and other Nodes. For assistance with this, consult the Security Groups guide at Security Groups.
Now that the instance has been deployed and configured in AWS, it is recommended that you read the AWS Initial Setup guide.
Here you can create the content that will be used within the module.

Bridgeworks have looked at the problem of data movement and come at it from an entirely new perspective. In mastering the rules of data movement over distance, Bridgeworks have now broken them to provide you with the ability to move significant volumes of business critical data in real time removing unacceptable time lags, that risk failure, delay or presents major costs to your business.