CONFIGURING YOUR WANROCKIT CSP NODE TO PRESENT ISCSI TARGETS INTO THE CLOUD
INTRODUCTION
This guide will teach you how to log on to an iSCSI target from your on-prem WANrockIT Cloud Service Provider (CSP) Node. This allows the devices attached to the target to be presented over a WANrockIT connection into the cloud. This tutorial will use a Microsoft iSCSI virtual disk on a Windows Server 2012 virtual machine and a WANrockIT CSP Node, both in the same ESXi host.
CONFIGURING FEATURES
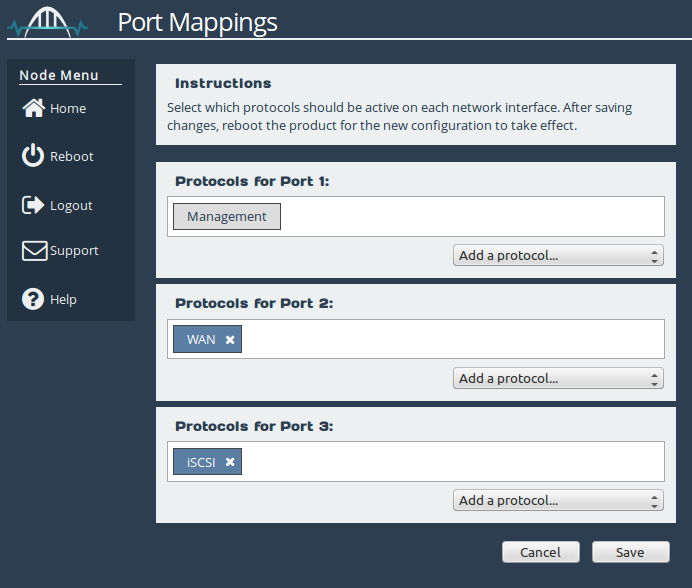
You must ensure that the port from which you wish to establish a connection has the iSCSI protocol mapped to it. In this example, Port 3 will be used, as shown in the image below. A reboot would be required before any changes to the port mappings would take effect. For a more detailed guide on port mappings see the CSP Initial Setup guide.
SETTING UP AN ACCESS CONTROL LIST ON WINDOWS SERVER
Retrieving the WANrockIT’s IQN
The Microsoft iSCSI virtual disk target requires entries to be added to an access list. Typically, an IQN is added to the list; alternatively, an IP address can be added. Not all targets require this method of authorisation, so this step may be skipped depending on your setup.
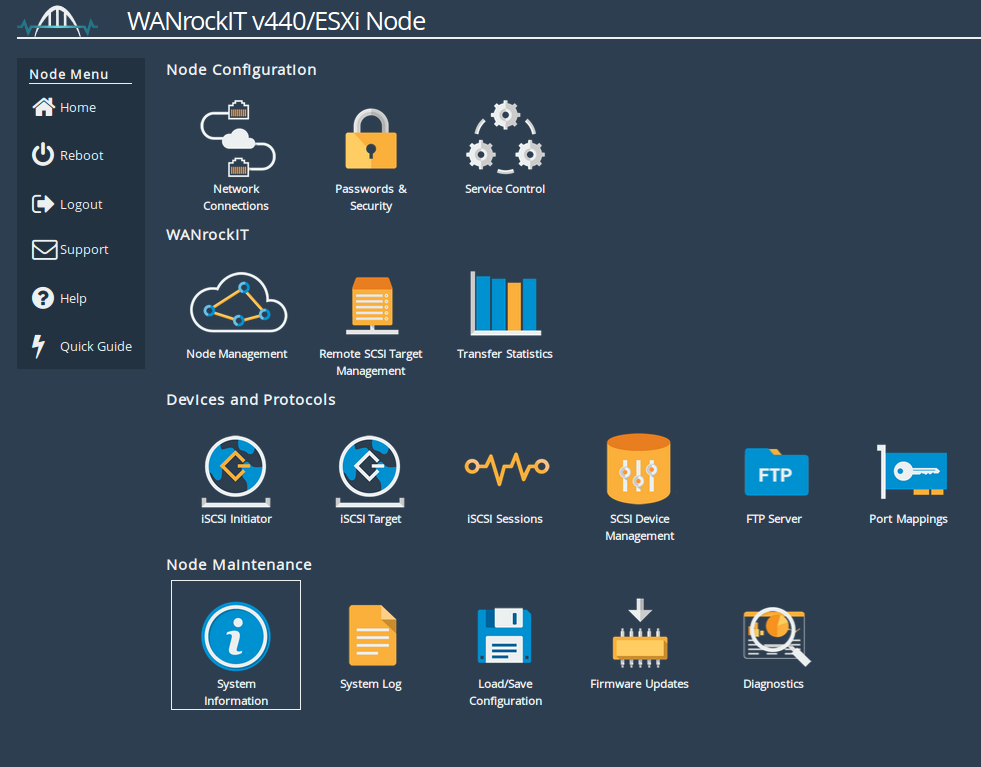
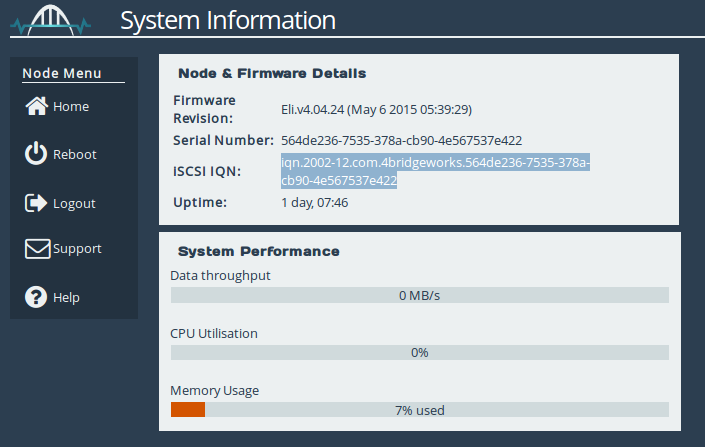
Log into the web interface of your WANrockIT Node and navigate to the System Information page by clicking on the corresponding icon.
Next you should copy the value in the iSCSI IQN field to the clipboard.
Adding the WANrockIT’s IQN to the Access Control list
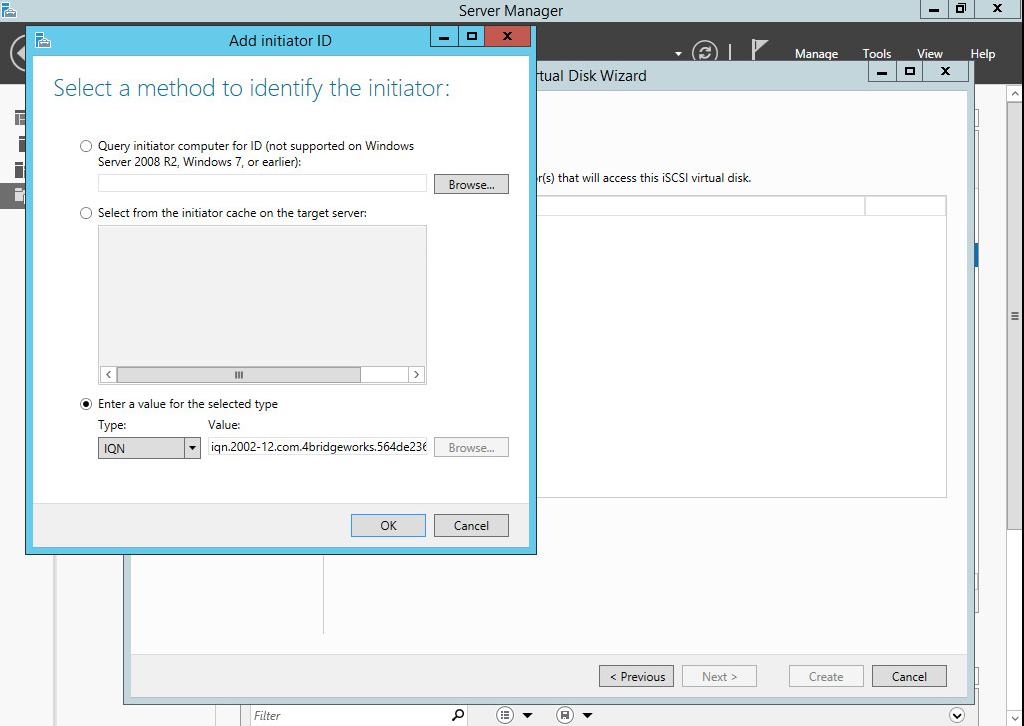
From your Windows Server 2012 virtual machine, navigate to the iSCSI Virtual Disk page. Under the iSCSI Targets subsection, right-click on the target to which you wish to connect and select “Properties”. Under the “Initiators” tab, add the IQN of the Node and click “OK” to confirm. Now the Node is authorised to connect to the target.
LOGGING ONTO THE ISCSI TARGET
The next step is to perform a discovery on the target portal. Navigate to the Node’s home screen and open to the iSCSI Initiator page by clicking on the corresponding icon.

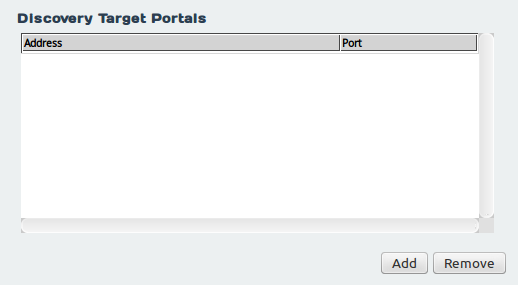
Under the Discovery Target Portal subsection, click the “Add” button;
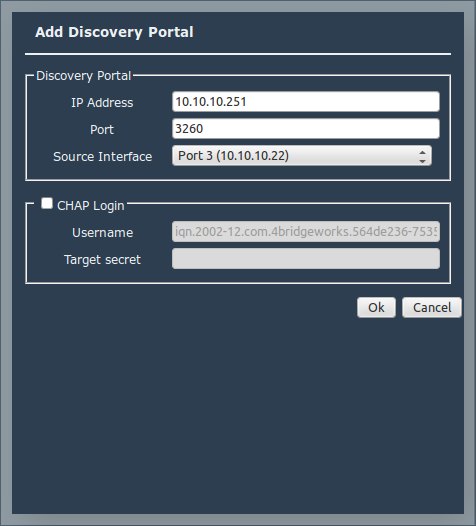
In the subsequent dialogue (see above), enter the IP address of the Microsoft iSCSI target portal in the “IP Address” field. The default port number assigned to iSCSI is 3260. If you have configured the Windows iSCSI target to use a different port number, you should enter this number in the Port field. If you have assigned iSCSI to more than one interface, you will need to ensure the Source Interface dropdown has the correct interface selected to perform the discovery.
In this example CHAP authentication is not required. More detailed information on CHAP authentication can be found within the Bridgeworks User Manuals.
When the discovery has been completed, a list of targets presented by the portal will be shown in the “Targets” subsection. The example shows a single target with an IQN of “iqn.1991-05.com.microsoft:win-8g8f69culub-test-target” that is currently inactive; that is, the iSCSI initiator is not currently logged onto the target.
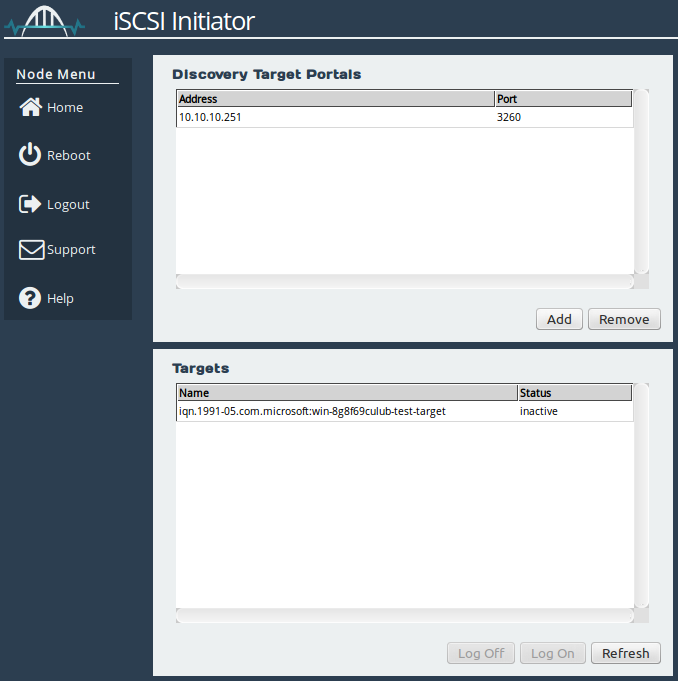
Now you are ready to perform a logon to a target. You should select the required target under the “Targets” section and click the “Log On” button. You will be presented with the screen below:
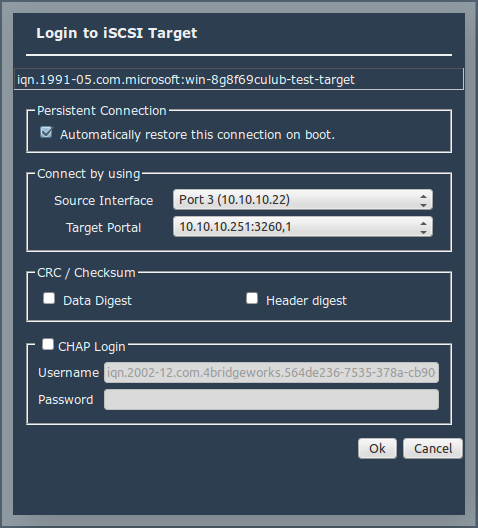
If you do not require the Node to reconnect automatically to this target after a reboot, you should un-check the “Persistent Connection” checkbox. As with the portal discovery, you must ensure that the correct interface is selected from the “Source Interface” dropdown. You must also ensure that the correct iSCSI target address is selected under the “Target Portal” dropdown.
“Data Digest” and “Header Digest” can be enabled in the CRC/Checksum subsection. As with the discovery, you can enter your relevant CHAP details if necessary, although this box remains unchecked in the example above. Next you should click the “OK” button to log on. This will change the status of the target from “inactive” to “connected”. The target will also be listed in the Persistent Targets subsection, if the “Persistent Connection” checkbox was left enabled. Any targets listed here will be logged onto after each reboot of the Node.
VERIFYING THE LOGON
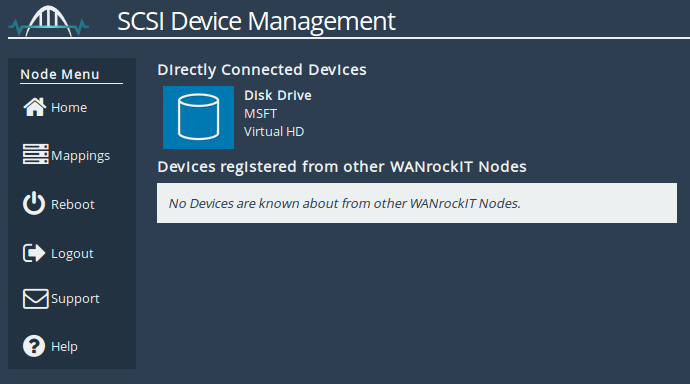
To verify that the logon was successful, you should navigate to the home screen and then to the SCSI Device Management page. As shown below, the devices from the iSCSI target are shown in the list of “Directly Connected Devices”. These devices are now presentable over a WANrockIT connection.

Bridgeworks have looked at the problem of data movement and come at it from an entirely new perspective. In mastering the rules of data movement over distance, Bridgeworks have now broken them to provide you with the ability to move significant volumes of business critical data in real time removing unacceptable time lags, that risk failure, delay or presents major costs to your business.