CONNECTING YOUR NODES USING NAT
INTRODUCTION
In this guide you will learn how to connect your on-prem ESXi WANrockIT Node instance to your AWS Node instance using its Elastic IP address. This step will establish the connection between your premises and the AWS Cloud using your Nodes.
DETERMINING THE IP ADDRESSES TO BE USED
You will require two IP addresses in order to make the connection:
- The public IP address of the AWS WANrockIT Node
- The IP address of your on-prem network
If you do not know the public address of your on-prem network, please consult your system administrator. The public IP address for the AWS Node should be an Elastic IP attached to its WAN interface. To determine this address, navigate to the “Instances” page of the EC2 dashboard, and select the Node. In the “Description” tab in the lower pane, select the Node’s WAN port, as shown below. By default, Port 1 (“eth0” in the EC2 dashboard) is assigned as the WAN.
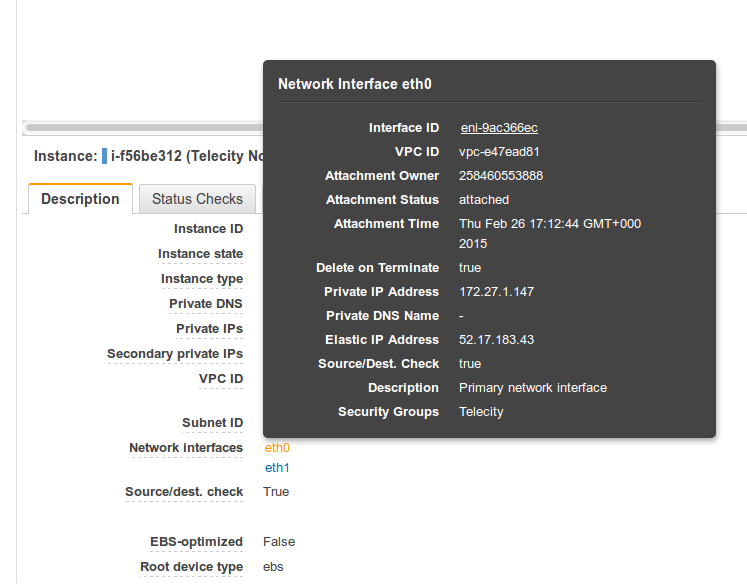
Make a note of the Elastic IP Address field. If the field contains no IP address, you will need to attach an Elastic IP before continuing.
You must also ensure the address is a manually-assigned Elastic IP, and not an auto-assigned public IP, as the latter will change if the instance is stopped and restarted. To confirm this is the case, navigate to the Elastic IPs page of the EC2 management console and ensure that the interface’s public IP address is present on this page. If not, you will need to attach an Elastic IP before continuing.
CONFIRMING AWS SECURITY GROUPS
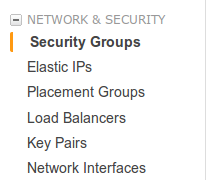
The next step is to allow WANrockIT traffic through the security groups to the AWS Node. Navigate to the “Security Groups” page of the EC2 dashboard, as shown below:
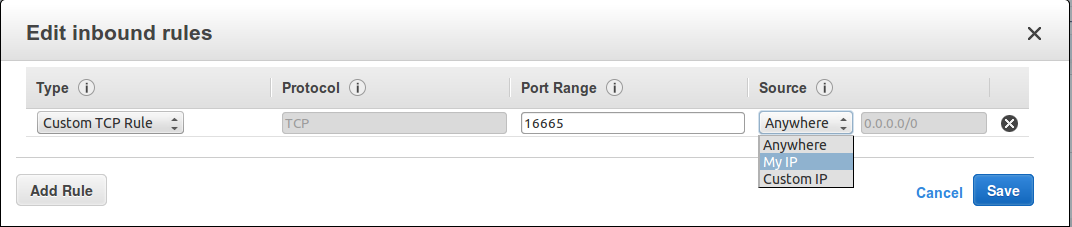
If you are using the security group that was created by default during your one click launch, WANrockIT traffic will already be allowed. If you are using your own security group, you will need to add an inbound rule to allow TCP traffic over port 16665. If you plan to use IPsec encryption, further rules must also be created – consult Security Groups for more information.
The “Source” should be the IP address of your on-prem network, followed by “/32” as the netmask value. As shown in the image below, this can also be done by selecting “My IP” if you are configuring this from the same site that will be connecting into your Node.
WAN PROTOCOL MAPPING
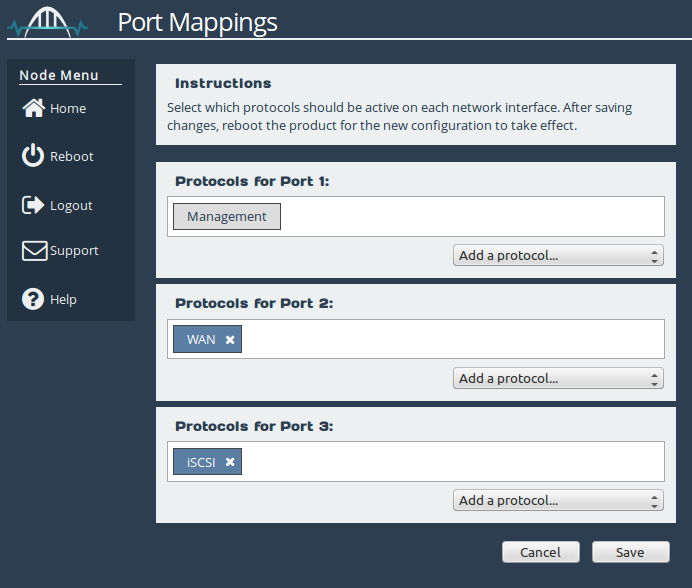
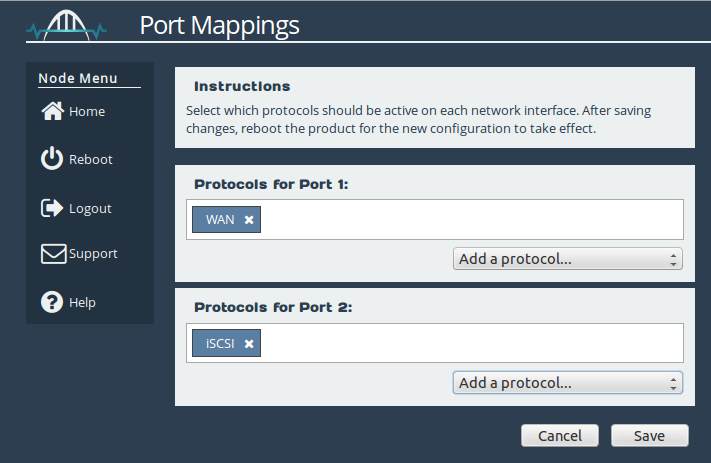
In order to establish a connection, you must have the WAN protocol mapped to at least one network port on each of your WANrockIT instances. The default configuration is for WAN to be attached to Port 2 on the WANrockIT CSP Node and for WAN to be attached on Port 1 on the AWS WANrockIT instance.
The ESXi Node’s mapping should look similar to that shown below, where Port 3 can be any LAN protocol. For more details on setting up your protocol mappings, see the Initial Setup of your CSP Node guide.
The AWS instance should have protocol mappings similar to those below, where Port 2 can be any LAN protocol.
The next step is to allow the on-prem Node to make a connection by adding it to the Remote Node Access Control list.
NODE MANAGEMENT – AWS NODE
From the AWS Node’s web interface, navigate to the Node Management page. Under Remote Node Access Control, enter your on-prem network’s IP address and click the “Add” button.
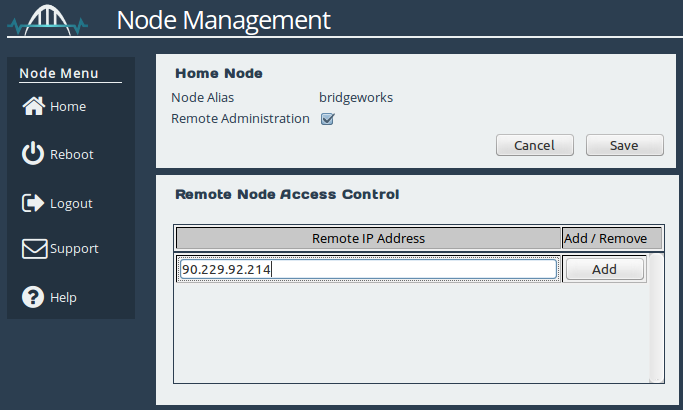
When the address has been added successfully, you will see the IP address entry included in the list, as shown below:
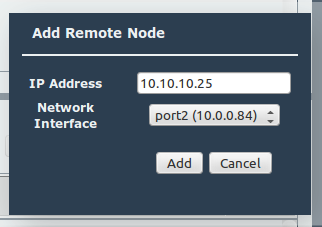
NODE MANAGEMENT – CSP NODE
The final stage is to perform the WANrockIT discovery on the WAN link. From the on-prem Node’s web interface, navigate to the Node Management Page. Click the “Add Node” button to bring up a dialogue box, and enter the AWS Node’s public IP address. The “Network Interface” dropdown allows you to change the interface from which you wish to connect; more than one option will only be available if you have added WAN functionality to multiple network interfaces. Finally, click “Add”, and the Nodes will negotiate a connection.
When the connection has been established you will see the following dialogue:
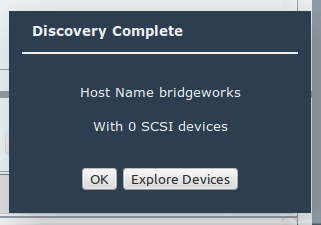
The AWS Node’s IP address will automatically be added to the on-prem Node’s Access Control list when you initiate the discovery. This will allow you to make the reverse WAN connection – from the AWS Node to the on-prem Node – if your topology requires it.
Congratulations, you have successfully set up your connection between your Nodes. Please refer to the on-prem or off-prem guides to learn how to set up your iSCSI or FTP protocols.

Bridgeworks have looked at the problem of data movement and come at it from an entirely new perspective. In mastering the rules of data movement over distance, Bridgeworks have now broken them to provide you with the ability to move significant volumes of business critical data in real time removing unacceptable time lags, that risk failure, delay or presents major costs to your business.