CONFIGURING YOUR AWS NODE TO PRESENT ISCSI TARGETS FROM ON-PREM
INTRODUCTION
This guide will teach you how to log on to your Node’s iSCSI target Portal from your off-prem location using a Windows Server 2012 machine. This allows the devices in your premises to be presented over a WANrockIT connection into the cloud. This tutorial will use the Microsoft iSCSI Initiator on a Windows Server 2012 instance and a WANrockIT AWS Node, both in the same VPC.
Before following this guide, ensure you have performed the following:
- iSCSI Initiator: On-Prem or Fibre Channel Initiator – Connected your on-prem devices to your on-prem Node.
- WAN Link Connectivity – Connected your AWS Node to your on-prem Node.
CONFIGURING FEATURES
Proceed to your AWS Node’s web interface by entering its public IP address into your web browser’s address bar. Enter the username “admin”, and then your password, to log in to the Node.
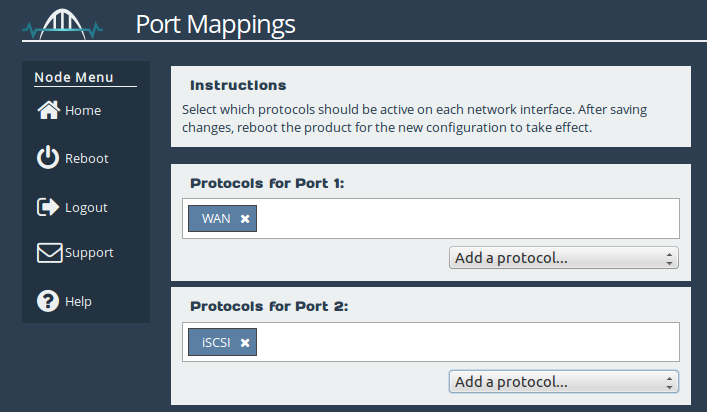
You must ensure that the port from which you wish to establish a connection has the iSCSI protocol mapped to it. In this case, Port 2 will be used, as shown in the image below. A reboot is required for any changes to the port mappings to take effect. For a more detailed guide on port mappings see the AWS Initial Setup guide.
CONFIRMING THE PRESENCE OF ISCSI TARGETS
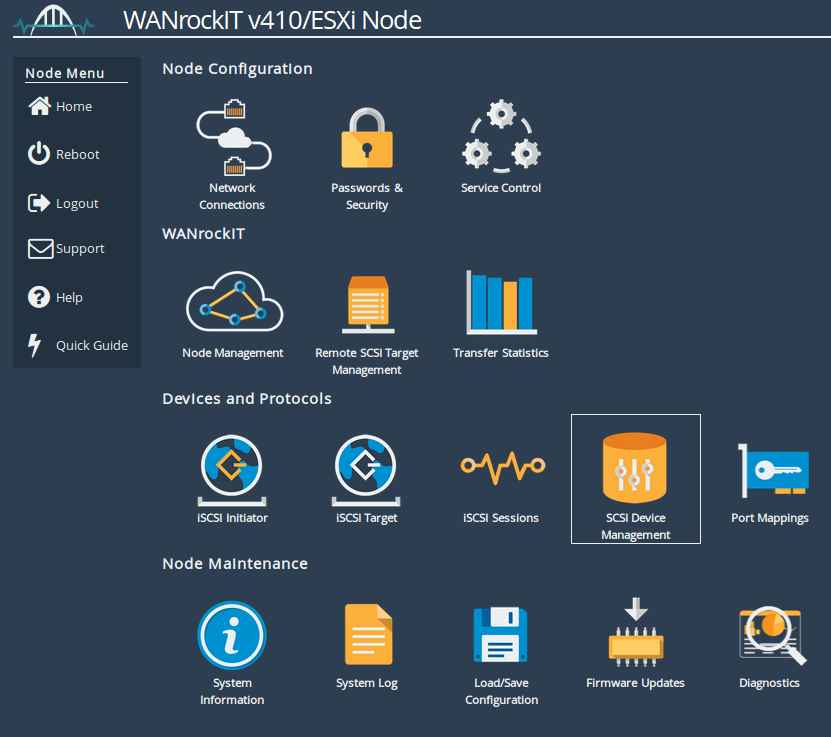
In order to confirm that iSCSI targets will be presented to your initiator, you should confirm that there are devices present on your Node from other WANrockIT nodes. To do this, navigate to “SCSI Device Management” by clicking the corresponding icon as shown below.
You will be presented with a page that contains a list of all the devices connected to your Node as either “Directly Connected Devices” (i.e. an iSCSI logon was performed from this Node to an external iSCSI target) or as “Devices registered from other WANrockIT Nodes” (i.e. a WAN connection was established to another WANrockIT instance which has “Directly Connected Devices”.
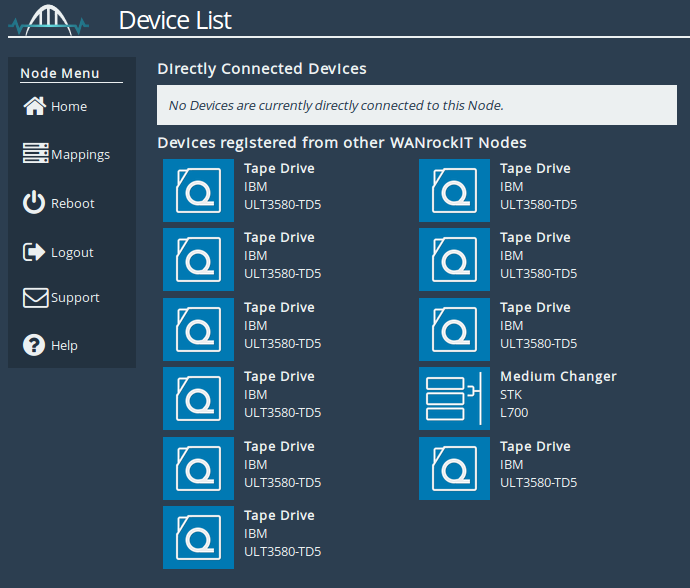
Only devices which are registered from other WANrockIT Nodes will be available for a local iSCSI connection. If you do not have any devices please see the guides Configuring your AWS WANrockIT Node to Present the AWS Storage Gateway On-Premise, Configuring your AWS WANrockIT Node to Present Generic iSCSI targets On-Premise and WAN Link and Connectivity. If you have already followed these guides then please see our Troubleshooting FAQ.
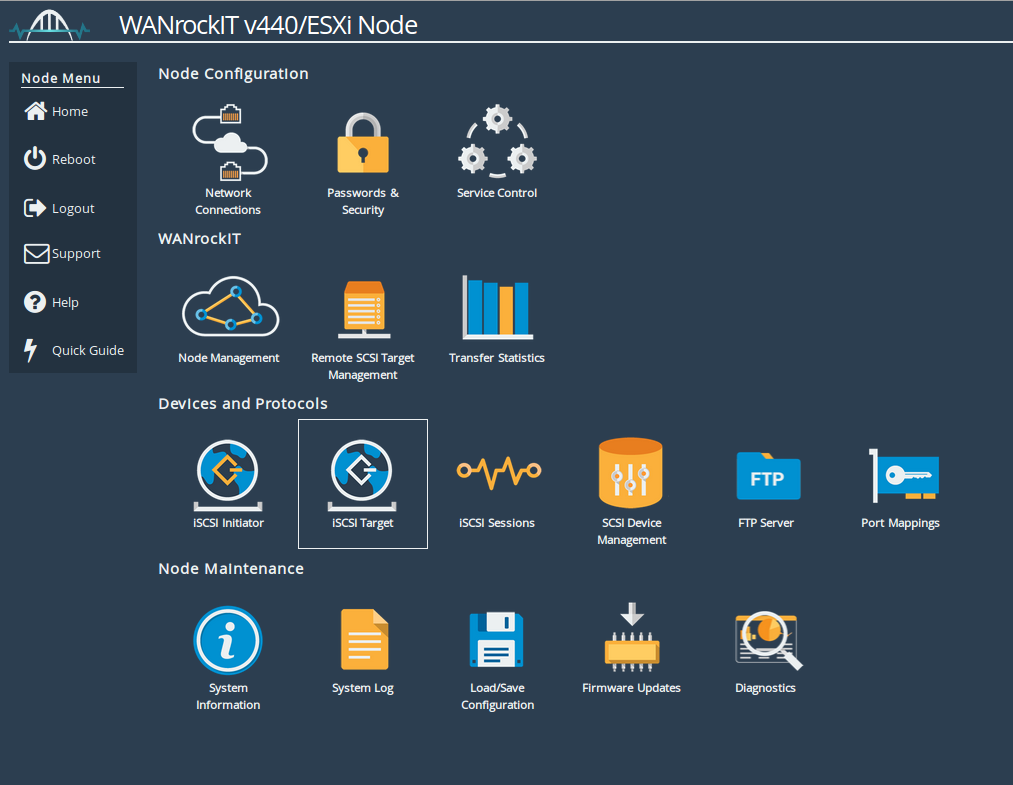
As soon as your mappings are configured and you have confirmed that your devices are presented in the cloud, you should return to the Node’s home screen and navigate to the iSCSI Target page by clicking on the corresponding icon.
You will then be presented with the following screen;
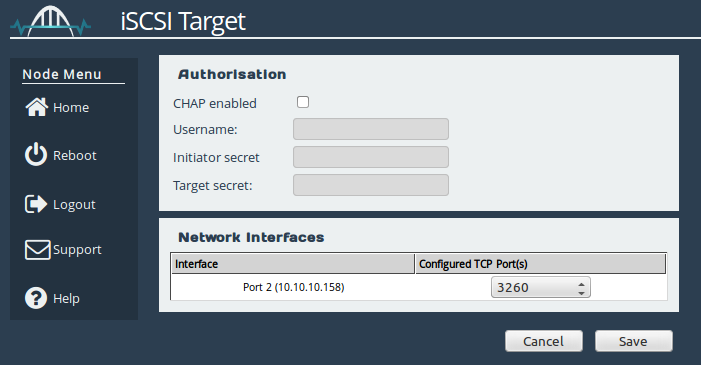
If you wish to enable one-way or mutual CHAP authentication, you can do so under the Authorisation subsection. Just click the “CHAP enabled” check box and enter in your required details.
Under the Network Interfaces subsection, you can change the TCP port on which iSCSI is available for each Network interface from “3260” to “860”, or you can enable both TCP ports. Make a note of the local IP address of the interface you wish to connect to and if you have changed any settings on this page, click Save to confirm. Any changes made will take effect immediately.
You are now ready to perform an iSCSI discovery, and subsequently, log onto remote devices.
USING THE MICROSOFT ISCSI INITIATOR TO LOG ONTO TARGETS
Open the iSCSI initiator, then click on the Discovery Tab. You should see the window below:
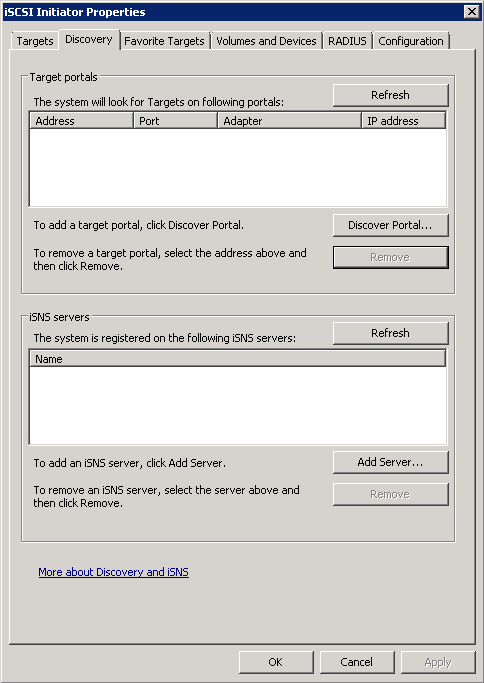
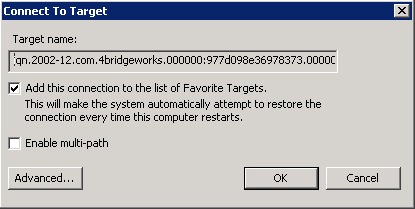
To add an iSCSI Target portal, click on ‘Discover Portal’. You will be presented with a window as below:
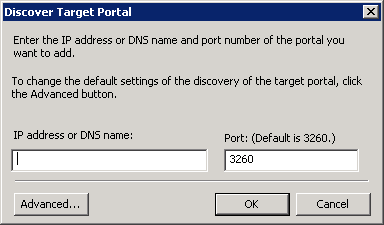
Enter the IP address you noted down previously from the “iSCSI Target” page from the WANrockIT Web Interface. Leave the port as 3260 unless you have configured your iSCSI Node only to respond on port 860, in which case change it to 860.
Now click OK and the Microsoft iSCSI Initiator shall perform the discovery. This usually completes quickly but can take up to a minute with multiple network ports. Click on the Targets tab. The devices discovered should now be listed and shown as below:
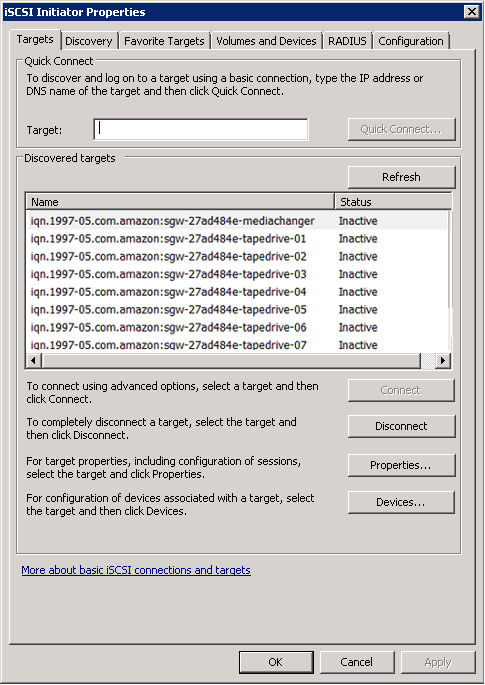
As you can see, the VTL medium changer and ten tape drives are now presented. To connect to one of the iSCSI targets, click on one of the target names and then click the ‘Connect’ button. A window should appear.
Click the OK button and you will see the status has changed to connected, as shown below:

For a more detailed guide on Microsoft iSCSI Initiator logons, please consult the following page:

Bridgeworks have looked at the problem of data movement and come at it from an entirely new perspective. In mastering the rules of data movement over distance, Bridgeworks have now broken them to provide you with the ability to move significant volumes of business critical data in real time removing unacceptable time lags, that risk failure, delay or presents major costs to your business.