CONFIGURING YOUR ON-PREM NODE FOR FTP SERVERS IN AWS
INTRODUCTION
This guide will teach you how to connect to an FTP server in the AWS cloud, from an on-prem FTP client, using WANrockIT acceleration. This example will use Windows Explorer on a Windows Server 2012 virtual machine, and a WANrockIT CSP Node, both on the same ESXi host.
Before following this guide, ensure you have performed the following:
- AWS Deployment & AWS Initial Setup – Deployed and set up your WANrockIT Node in the AWS Cloud.
- Cloud Service Provider – Deployed your CSP Node and performed initial setup.
- WAN Link Connectivity – Connected your AWS Node to your on-prem Node.
- FTP Server Node Configuration – Configured your AWS Node to accelerate your chosen cloud FTP servers to your on-prem Node.
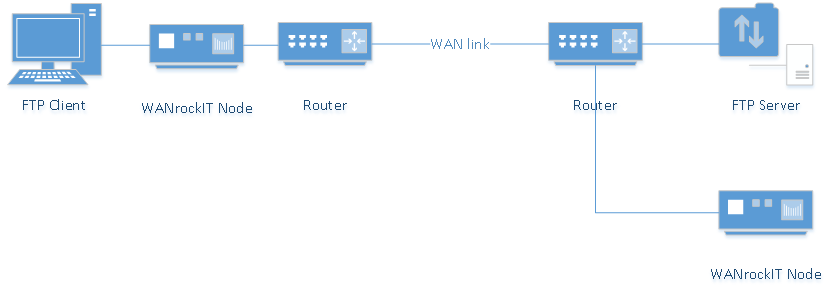
The diagrams below depict the transition this guide covers.
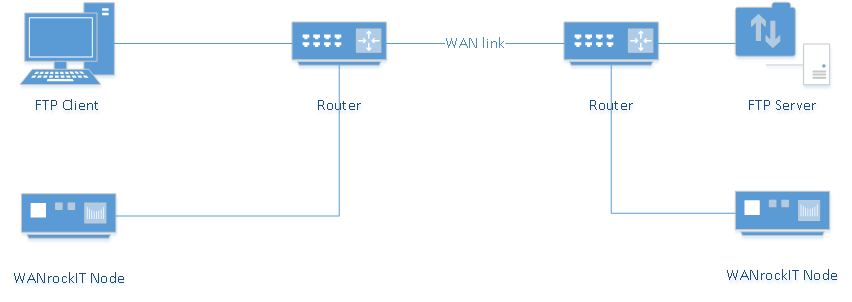
WAN link established between Nodes. The server-side Node has been configured to accelerate FTP traffic to the server’s address.
SETTING UP VSWITCHES TO WORK WITH FTP
Turning on the FTP client protocol will create a network bridge between the WAN port (Port 2 by default) and the LAN port (Port 3 by default) to act as a “bump in the wire”. To be more precise, the Nodes are transparent to the client. In order to achieve this, promiscuous mode needs to be enabled on the LAN port’s vSwitch.
From your vSphere client, click on the host from the left hand menu, then click the “Configuration” tab. Under the hardware menu on the left, click on “Networking”, as shown below:
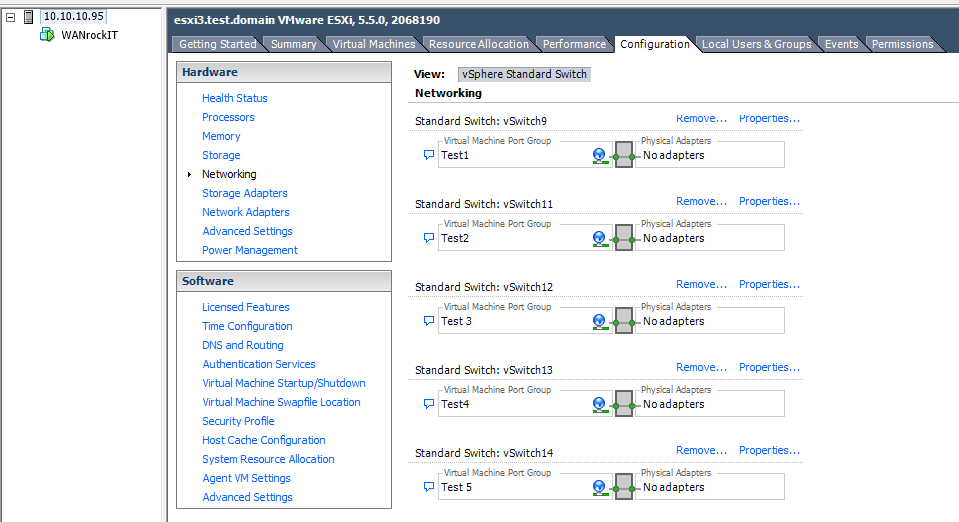
Select the switch that you connected to the LAN port of the Node and click on “Properties…”. You will be presented with the following screen:
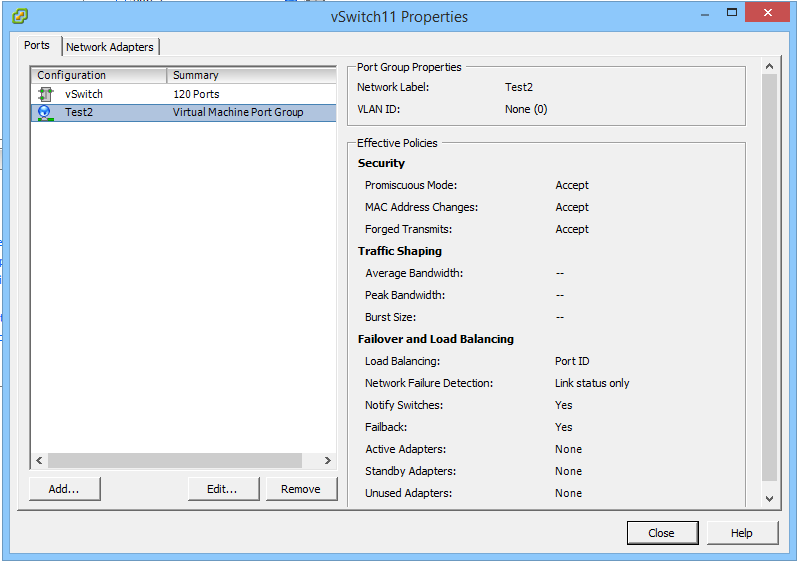
Select the Port Group you are using and click on “Edit”. On the screen that follows, click on the “Security” tab, and you will be presented with the following screen:
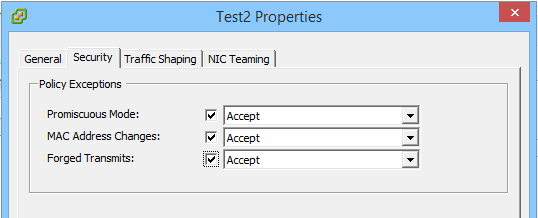
Next to “Promiscuous Mode:” ensure the check box is enabled and that the drop down box is set to “Accept” and click “OK”.
This switch has now been configured correctly. If the Node has more than one FTP client port configured, and they are attached to different vSwitches, you will need to repeat this process for the remaining vSwitches.
CONFIGURING FEATURES
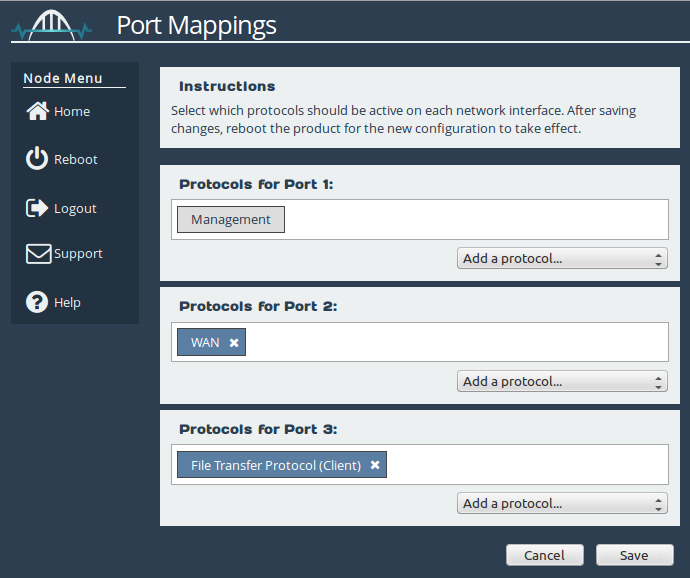
You must ensure that the network port from which you wish to connect to your FTP client has the “File Transfer Protocol (Client)” protocol mapped to it. In this case, Port 2 will be used, as shown in the image below. If there are any changes to the “Port Mappings”, a reboot is required for the changes to take effect. For a more detailed guide on port mappings see the CSP Initial Setup guide.
When your mappings are configured for your scenario, you should return to the Node’s home screen and navigate to the FTP Client page by clicking on the corresponding icon, as show below.

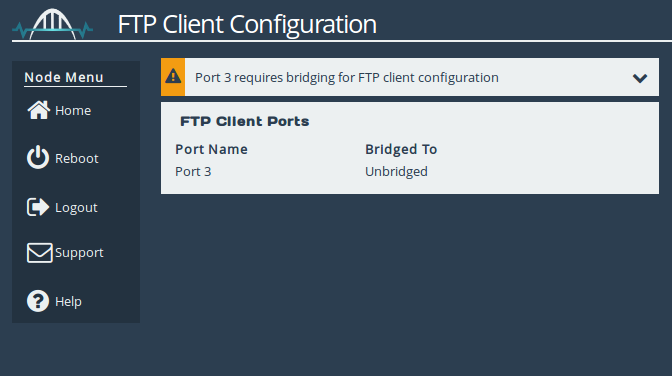
On the first load of the page you will see that Port 3 is currently “Unbridged”, and there is an alert at the top of the screen, as shown below.
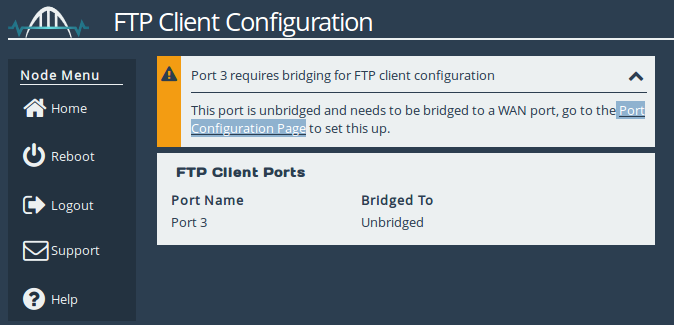
Expanding the alert will inform you which network port needs to be bridged. The alert also contains a link to the “Port Configuration Page” as shown below. Your port must be bridged for the FTP acceleration to work.
To enable port Bridging click the link and you will be directed to the network configuration page for that Port as shown below.
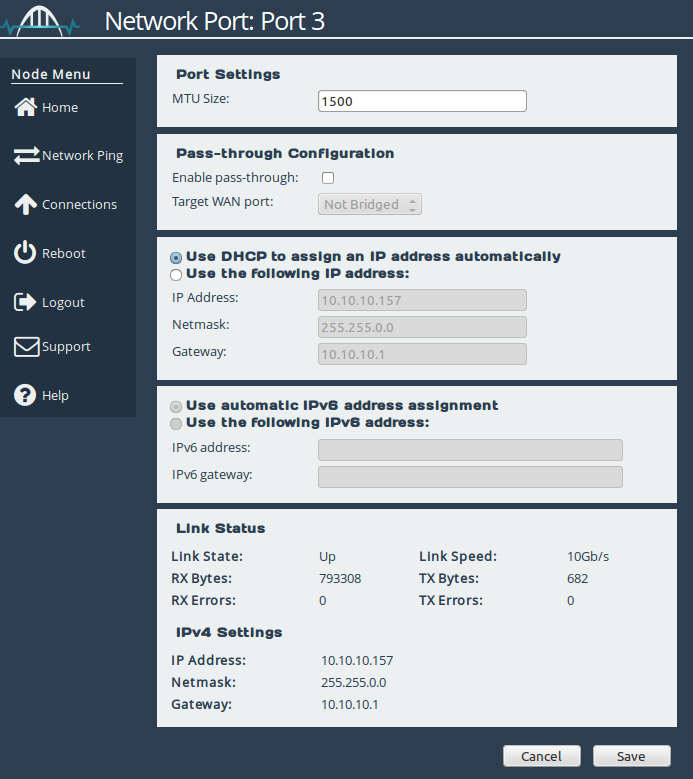
Click on the “Enable pass-through” checkbox under the heading “Pass-through Configuration”. You can then select a WAN port from the drop-down list, and you should click “Save” when done. A reboot will be required for the changes to take effect.

The WAN port selected will now transparently accelerate FTP traffic from the FTP port. As this acts like a “bump in the wire”, it is important to ensure that the ports are isolated from each other to prevent loops being created in the network.
CONNECTING USING WINDOWS EXPLORER
Using the Windows Server 2012 virtual machine, we will now connect to a configured FTP server. After logging in, open This PC (My Computer), then select the Computer menu.
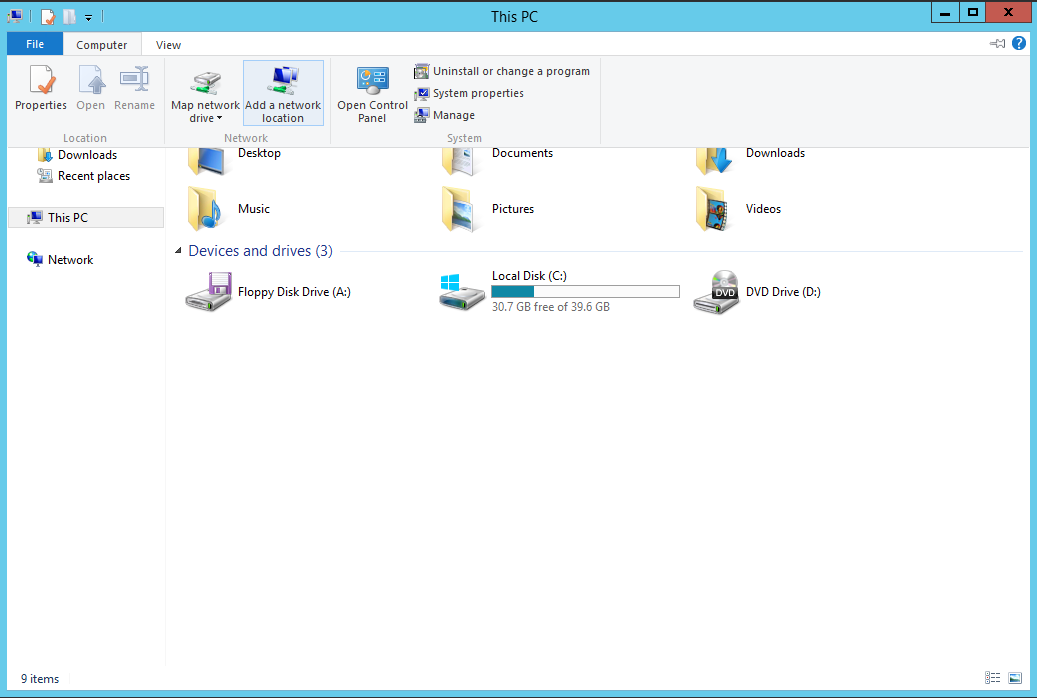
Now select “Add a network location”, which will open the Add Network Location wizard. On the first screen click “Next”; on the second select “Choose a custom network location” then click Next. You’ll now be on the following screen.
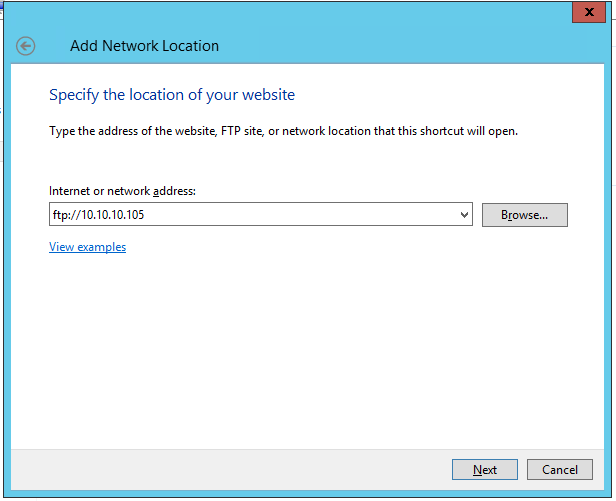
Fill in the FTP server IP address (The IP address of the FTP server in the cloud) with the prefix of “ftp://” (as seen above) and then click Next.
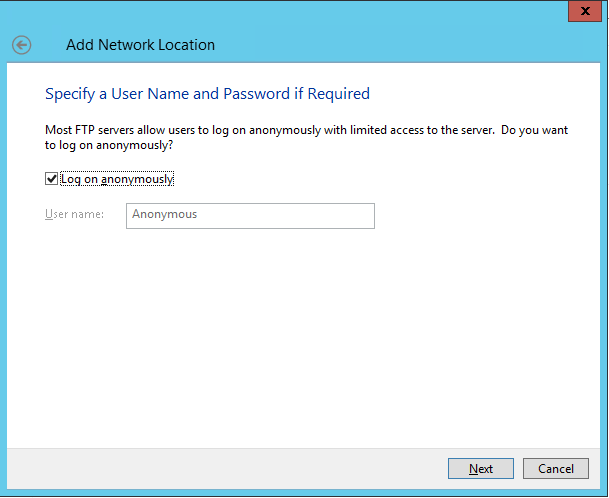
Fill in the username and password required to access the FTP server. In this example the server has been configured to allow anonymous access, so we simply leave the “Log on anonymously” option checked and click Next. The next screen will ask you to name the network location, after choosing one click Next to move on to the final screen.
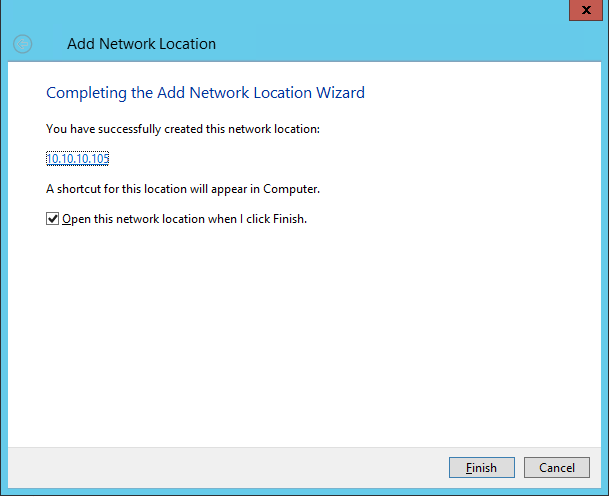
Click Finish on the final screen when ready. The connection should now be established and you can copy files to and from the FTP server using WANrockIT acceleration.
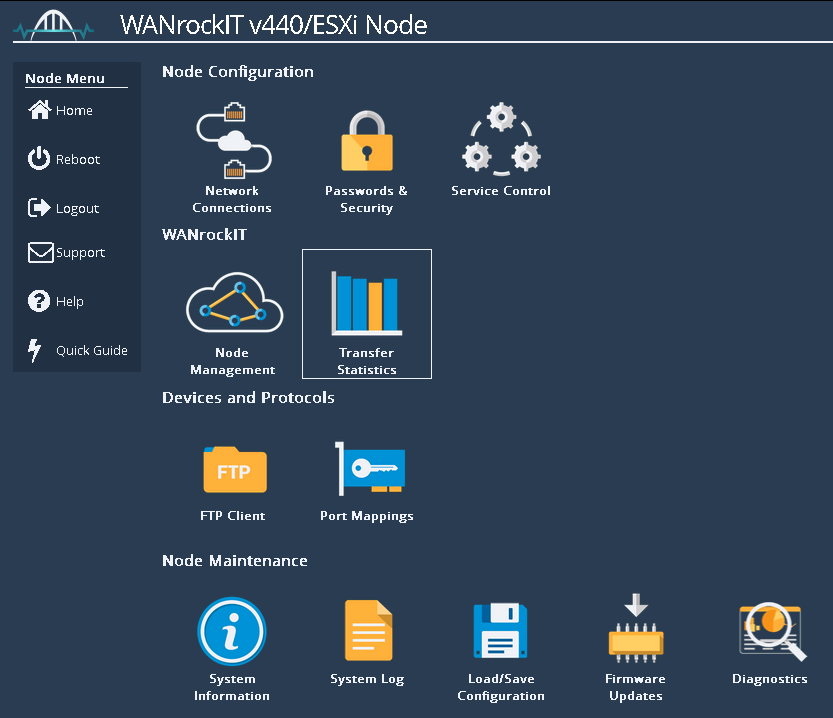
To confirm that transfers are being accelerated through the WANrockIT acceleration engine, navigate to the “Transfer Statistics” page as shown in the image below:
When files are being transferred, the graph should indicate a transmission rate, the image below shows that files are being sent form this node and that the rate is between 7MB/s and 12 MB/s.
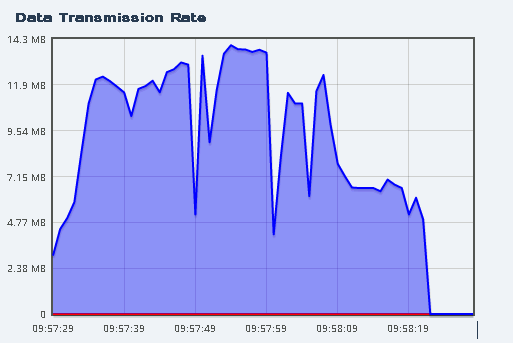
If files are being transferred but the graph is not moving please consult our Troubleshooting FAQ.

Bridgeworks have looked at the problem of data movement and come at it from an entirely new perspective. In mastering the rules of data movement over distance, Bridgeworks have now broken them to provide you with the ability to move significant volumes of business critical data in real time removing unacceptable time lags, that risk failure, delay or presents major costs to your business.